A roof can look perfectly finished on a dry day and still fail badly the moment sustained rain arrives — many roofing defects are simply invisible until water pressure and wind-driven rain test every seam, overlap and fixing point. This guide covers the five mistakes that most reliably surface once the rainy season starts, drawing on the same pricing and specification logic behind our free Roofing Calculator.
Mistake 1: Insufficient Roof Pitch for the Covering Material
Every roofing material has a minimum recommended pitch below which water can be driven back up under the overlaps by wind, or simply fails to run off fast enough during heavy rain. Long-span aluminium sheet generally performs well down to a relatively low pitch, but tile roofing typically needs a steeper minimum pitch to shed water reliably at the joints between individual tiles. Building a roof at too shallow a pitch for the chosen covering — sometimes done to reduce material quantity and save cost — is a design decision that only reveals its consequences once heavy, wind-driven rain arrives.
Mistake 2: Inadequate Overlap Between Sheets
Roofing sheets need a minimum side and end overlap to shed water reliably, and this overlap requirement increases at shallower pitches. Cutting the overlap short to stretch a limited sheet order further — a temptation when a delivery falls short of the calculated quantity — is one of the most common causes of persistent leaks that only appear during sustained or heavy rain, since a slight overlap may cope with light rain but fail under wind-driven, heavier downpours.
Mistake 3: Skipping or Skimping on the Underlay/Waterproof Membrane
A waterproofing membrane beneath the roofing sheets provides a secondary barrier against any water that finds its way past the primary covering — through a damaged sheet, a poorly sealed penetration, or wind-driven rain at an overlap. Skipping this membrane to save cost removes that secondary protection entirely, meaning any small defect in the primary covering becomes a direct leak into the ceiling void rather than being caught and drained away. This is a false economy that is invisible until the first significant rain finds the one weak point in the primary covering.
Mistake 4: Poor or Incomplete Guttering and Fascia Detailing
Guttering that is undersized for the roof's catchment area, poorly pitched (not sloped enough to drain to the downpipe), or simply omitted at the design stage copes fine with light rain but overflows during a heavy Nigerian downpour, sending water down the building's walls and, over time, contributing to damp problems and render or paint failure at the eaves. Confirm gutter sizing against the actual roof area it serves, not a generic standard size, particularly on a roof with a large catchment area feeding into a small number of downpipes.
Mistake 5: Incorrect or Insufficient Fixings
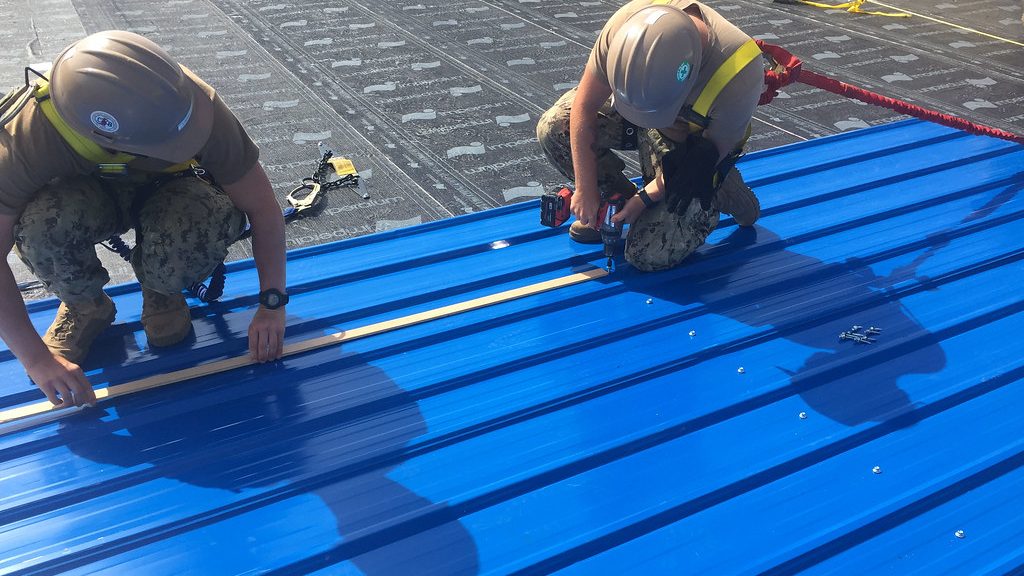
Roofing sheets are held down with J-bolts or similar fixings at specific spacing intervals, and using too few fixings, the wrong fixing type, or fixings without proper sealing washers is a common cost-cutting shortcut that only becomes apparent when strong wind during a storm lifts or rattles loose sheets — sometimes tearing them away entirely in extreme cases. Correct fixing spacing and type should follow the roofing manufacturer's specification for the sheet gauge and the site's wind exposure, not a generalised "enough to hold it down" approach.
A Pre-Rainy-Season Roof Checklist
- Confirm the roof pitch meets the minimum recommendation for the chosen covering material.
- Verify actual overlap on installed sheets matches the specified minimum, not a reduced overlap to stretch material.
- Confirm a waterproofing membrane is installed beneath the covering, not omitted to save cost.
- Check gutter sizing against the actual roof catchment area and confirm gutters are properly pitched to drain.
- Inspect fixing spacing and type against the manufacturer's specification for the sheet gauge used.
Most of these checks are far easier and cheaper to perform during installation, while scaffolding or roof access is already in place, than after a leak has already caused ceiling or interior damage. If you are inheriting an existing roof through a home purchase, a pre-purchase inspection covering these same points is a worthwhile investment before the rains test it for you.
Post-Installation Inspection: What to Check Before the Scaffold Comes Down
The point immediately after roof installation, while access equipment is still in place, is the cheapest and easiest time to catch and correct any of the defects covered in this guide — far cheaper than discovering them once scaffolding has been dismantled and the rainy season is already testing the roof. A methodical final inspection should walk every ridge and hip line checking capping is properly seated and fixed, every valley and junction checking flashing details are complete and properly lapped, and a sample of overlaps checked by hand to confirm they meet the specified minimum, not just look adequate from a distance.
Guttering should be checked for correct fall (a slight, consistent slope toward the downpipe, not a level or reverse-falling run that will pond water) using a spirit level along its length, and downpipe connections checked for secure, properly sealed joints. Fixing points across a representative sample of the roof area should be checked for correct spacing and proper seating of washers and seals, since a fixing that looks fine from ground level can be missing its weatherproofing washer entirely when viewed up close.
Keeping a simple written or photographic record of this final inspection, ideally with the roofing contractor present and in agreement about what was checked, creates a useful reference point if any issue does emerge later and a warranty or liability conversation becomes necessary. This modest additional diligence, taking perhaps an hour or two while access is convenient, is consistently cheaper than the alternative of discovering and diagnosing a roofing defect after the fact, often during the least convenient possible moment — an active downpour.
Frequently Asked Questions
How do I know if my roof pitch is adequate for my chosen roofing material?
Check the manufacturer's minimum pitch recommendation for the specific product — this varies between aluminium sheet profiles, stone-coated tile and clay/concrete tile, and should be confirmed before the truss design is finalised, not after the roof is already built.
Can a waterproofing membrane be added to an existing roof without removing the covering?
Generally no — the membrane sits directly beneath the roofing sheets on top of the purlins, so retrofitting it typically requires temporarily removing the existing covering, which is why it is far more cost-effective to include it correctly at initial installation.
What should I do if my roof already leaks during rain?
Identify the specific point of entry during active rain if possible (often easier to trace from inside the roof void with a torch than from outside), and address the specific cause — inadequate overlap, a damaged sheet, or a fixing failure — rather than simply resealing the general area, which can mask the problem without fixing it. Our Repairs Calculator can help price a proper repair once the cause is identified.
How often should an existing roof be inspected for developing problems?
An annual inspection, ideally shortly before the rainy season begins, is a sensible routine for most Nigerian homes — checking fixings, overlaps, guttering condition and any signs of corrosion or wear catches small problems while they remain cheap and simple to fix, well before they develop into an active leak during the wettest part of the year.
Are older roofs more prone to the mistakes covered in this guide?
Not inherently from age alone, but an older roof is more likely to have been built to older or less rigorous standards, and any original installation shortcuts — inadequate overlap, missing underlayment, undersized fixings — become more consequential as materials naturally age and weather over time, making a thorough inspection particularly valuable on any roof approaching or beyond its expected mid-life point.
Should I hire a specialist roofing inspector or rely on a general contractor?
For a routine annual check, an experienced general contractor familiar with roofing work is usually adequate. For a pre-purchase inspection of an older property, or where a persistent, hard-to-diagnose leak has resisted an initial repair attempt, a specialist roofing inspector's more focused expertise can be worth the additional cost to properly identify the actual root cause.
Price Your Roof, Sheet by Sheet
The free Roofing Calculator prices aluminium, stone-coated and tile roofing with your pitch, wastage and truss type. Fixing a leaking roof instead? Try the Repairs Calculator. Building the whole house? The Professional Estimator includes the complete roof structure and covering.
Open the Roofing Calculator →